
How to Automate Project Management

Automating your project management isn’t just a fancy tech upgrade; it’s about fundamentally changing how your team works. It’s the shift from being stuck in reactive busywork to driving proactive, strategic execution. By using a tool like Sagekit to handle the monotonous, repetitive tasks—like pinging people for updates, assigning routine work, or pulling reports—your team gets to focus on the work that actually requires their brainpower.
This is more than just a time-saver. It’s about building a project machine that’s more reliable, efficient, and ultimately, more successful.
Why Bother Automating Your Project Management?
Before we jump into the “how,” let’s get grounded in the “why.” Putting automation in place is a serious upgrade to your team’s operating system. It’s how you move beyond the grind of manual task tracking and those soul-crushing status meetings to solve nagging project problems right at the source.
Take a classic project headache: going over budget. In a manual world, the project manager usually spots the overspend after it’s already happened. With an automated system, you could set up an alert that fires off the moment spending hits 75% of the budget. That’s the difference between damage control and preventing a disaster.
Boost Efficiency and Sideline Human Error
Let’s be honest, the biggest reasons to automate project management are to get more done with less effort and to cut down on simple mistakes. Repetitive administrative tasks are not just a time suck; they’re a breeding ground for human error. One forgotten follow-up or a simple miscalculation can throw a whole timeline off course.
Automation is your safety net. It enforces consistency from one project to the next.
Here’s what that looks like in the real world:
- Slash Administrative Overhead: Imagine never having to manually compile another weekly status report. An automation can pull the data, format it, and send it to all stakeholders every Friday at 5 PM on the dot.
- Crystal-Clear Communication: The moment a task’s status is flipped to “Needs Review,” an automation can instantly ping the right person. No more chasing people down or wondering who needs to see what.
- Get Ahead of Problems: Set up automated alerts for looming deadlines or resource bottlenecks. This gives managers the heads-up they need to step in before a small issue snowballs into a major crisis.
A well-designed dashboard in Sagekit gives you a bird’s-eye view of all these moving parts, letting you see exactly how your automated workflows are connecting and doing the heavy lifting for you.
This kind of visual control makes it incredibly easy to manage your processes and see where automation is giving you the biggest wins.
To really grasp the difference, let’s compare the old way of doing things with the Sagekit approach.
Manual vs Automated Project Management Tasks
| Task | Manual Approach (The Old Way) | Automated Approach (With Sagekit) |
|---|---|---|
| Weekly Status Reports | PM spends 2-3 hours compiling data, writing updates, and emailing the team. High risk of outdated info. | A workflow automatically generates and distributes the report in under 5 minutes. Always uses real-time data. |
| Task Handoffs | Team member manually notifies the next person via email or chat. Prone to delays and communication gaps. | When a task is marked “Complete,” the next task is automatically assigned and the person is notified instantly. |
| Deadline Reminders | PM has to remember to check due dates and manually send reminders. Easy to forget or miss someone. | Sagekit sends automatic reminders 24 hours before a task is due, ensuring everyone stays on track without nagging. |
| Budget Tracking | Relies on periodic spreadsheet reviews. Overspending is often caught late in the game. | Real-time alerts are triggered when spending hits a preset threshold (e.g., 75%), allowing for proactive adjustments. |
The table makes it pretty clear: automation isn’t just faster, it’s smarter and safer.
The Real-World Impact of Automation
This isn’t just talk. The data backs it up. Over 90% of workers say automation has made them more productive at their jobs. On top of that, companies that embrace it have seen their operating costs drop by an average of 22%.
Of course, you can’t just flip a switch and expect magic. A lot of digital transformation projects don’t hit their targets because they lack a solid plan. It’s all about being strategic.
The end game is to build a more resilient and intelligent way of operating. Once you truly understand what is workflow automation, you can start spotting the best opportunities to improve your own processes and give your team the tools they need to shine.
How to Map Your Workflows Before Automating
Jumping straight into an automation tool without a clear plan is like trying to build furniture without instructions. You might end up with something, but it probably won’t be what you wanted. If you want to successfully automate project management, you first have to get a handle on the process you’re trying to fix.
Remember, automating a broken or inefficient workflow only makes bad things happen faster.
The real goal here is to dissect your current process, piece by piece, to find the perfect candidates for automation. We’re on the hunt for those repetitive, rule-based tasks that drain your team’s energy and time—the stuff that doesn’t need complex human judgment.
This is all about making the switch from manual slog to automated efficiency.
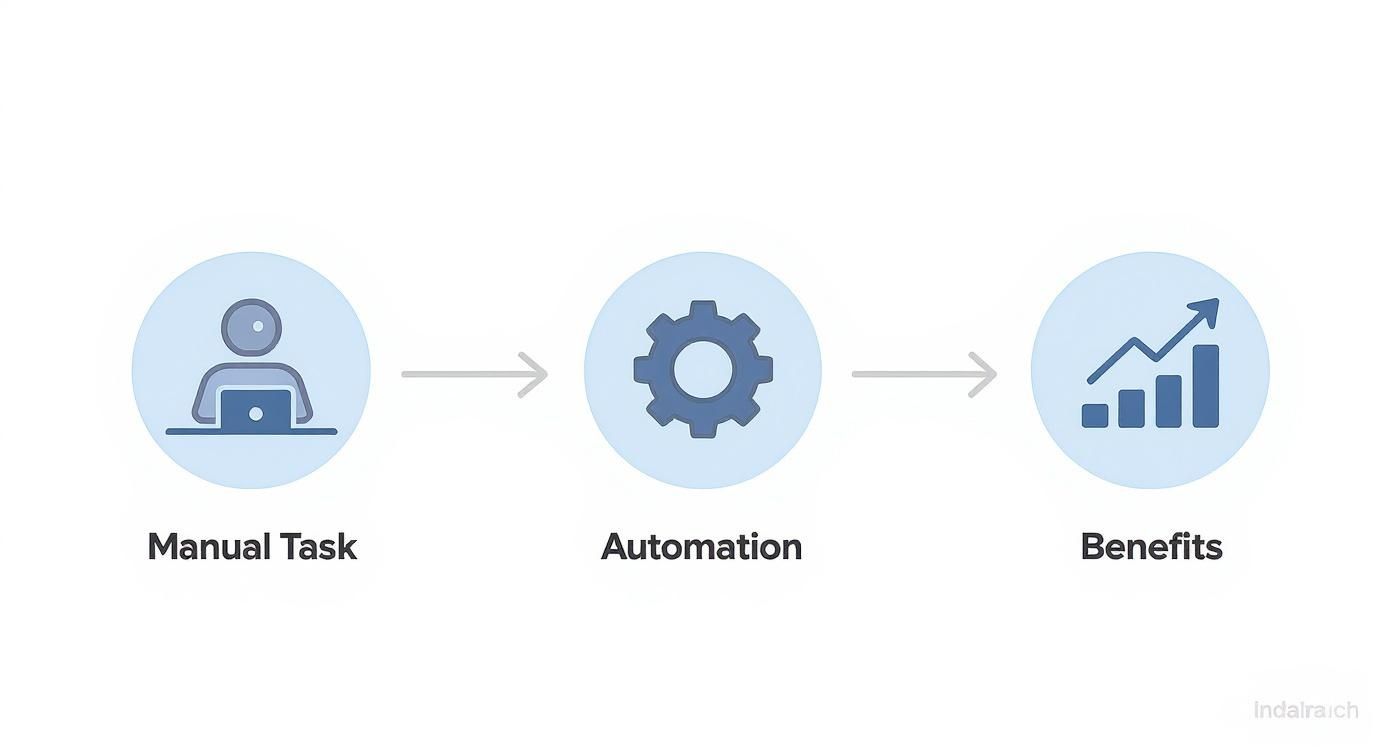
By taking a manual task and applying automation, you create a direct path to better project outcomes and growth.
Identify Automation-Ready Tasks
Start by observing the patterns in your team’s daily grind. What actions do they find themselves doing over and over again? The best tasks for automation are always the ones that are predictable and consistent.
Let’s think about a standard marketing campaign launch. I’ve seen teams automate pieces of this process with huge success. Here are a few spots ripe for automation:
- Initial Task Creation: Every time a new campaign kicks off, you know a standard set of tasks needs to be created—things like “Draft blog post,” “Create social media graphics,” or “Set up ad campaign.” This can be a template that fires automatically.
- Status Update Reminders: We all hate chasing people for updates. Instead of manually pinging team members as deadlines approach, let the system do the nudging.
- Handoff Notifications: When the copywriter finishes the blog post, the designer needs to know immediately so they can start on the visuals. No more waiting for someone to send an email.
- Final Approval Routing: Once all the assets are ready, they need to get in front of a specific manager for the final sign-off. This routing can be automated to prevent bottlenecks.
These are prime candidates because they follow a clear, repeatable logic. To get the most out of project management automation, you have to get the basics of workflow automation down first. The concepts apply everywhere. You can see how these ideas work in the real world by Mastering Marketing Workflow Automation.
Pro Tip: Don’t try to automate everything at once. I always advise teams to pick one high-impact, low-complexity workflow to start. A quick win builds momentum and gets everyone on board and excited about what’s possible.
Map the Triggers and Actions
Once you’ve zeroed in on a process, it’s time to map it out. You don’t need fancy software for this; a whiteboard or even a simple doc will do the trick. For every step in the process, you need to define the trigger (what starts the action) and the action (what happens next).
Let’s stick with our marketing campaign example and map out the handoff between the writer and designer.
- Trigger: The writer changes the status of the “Draft blog post” task to “Ready for Design.”
- Action 1: Sagekit automatically assigns the “Create social media graphics” task to the lead designer.
- Action 2: Sagekit then sets the due date for that graphics task to three business days from today.
- Action 3: Finally, Sagekit posts a notification in the #marketing-updates Slack channel, tagging the designer so they see it right away.
This simple “if-this-then-that” map becomes the blueprint for building the automation in Sagekit. It removes any guesswork and makes sure your automated workflow will do exactly what you expect from day one. Honestly, this foundational step is non-negotiable for success.
Building Your First Automation in Sagekit
Alright, let’s move from theory to action. This is the fun part, where you see just how much time you can claw back by automating project management tasks that currently slow your team down.
We’re going to build a super common workflow from scratch: automating the approval process for a new design asset. I’ve seen this one trip up countless creative teams. It’s a classic bottleneck, where everything grinds to a halt waiting for manual handoffs and follow-ups.

This is Sagekit’s visual canvas. It’s where you’ll drag, drop, and connect the dots between triggers, conditions, and actions. The intuitive layout makes it incredibly easy to see how your entire workflow hangs together, turning what seems like a complex process into a simple, logical sequence.
Defining Your Trigger
Every single automation has to start somewhere. That starting point is the trigger—the specific event that kicks everything off. Think of it as the starting pistol for your automated process. In Sagekit, you’ll find these options under the “When this happens…” menu.
For our design approval example, the trigger is pretty obvious. We want the automation to fire the second a designer is ready for someone to look at their work.
- Our Trigger: A file is uploaded to the “For Review” folder within our project space.
This works perfectly because it’s a clear, unambiguous action. The moment that file hits the folder, Sagekit knows it’s go-time. No gray areas, no confusion.
Setting Your Conditions
Next up, we need to add some conditions. These are basically the rules of the road for your automation. They make sure the workflow only runs when the circumstances are just right, preventing it from firing off at the wrong time.
Think about it: not every single file dropped into the “For Review” folder is a final design. It might be a source file, some reference images, or even a text doc with notes. We only want this specific approval workflow to run for final image files.
This is where conditions save the day:
- Head over to the “Only if…” section in the Sagekit builder.
- Set the condition to File type is .PNG.
- You could even get more granular by adding another condition, like File name contains ‘Final’.
These rules act as a gatekeeper, ensuring only the right items continue down the automated path. This is what makes project management automation so dependable. It’s a great first step, and if you’re looking to expand, automating repetitive data entry tasks is another area where you can find some massive efficiency gains.
The global push for automation in project management isn’t just a trend; it’s a fundamental shift. A recent Project Management Institute survey found that 21% of project managers are already using AI frequently, and a staggering 91% believe it will have a huge impact on their jobs.
Defining the Actions
Finally, we get to the “then what?” part of the equation: the actions. These are the specific tasks Sagekit will perform on your behalf once the trigger event has happened and all the conditions have been met.
This is where you’ll really start to feel the time savings compound. No more designers having to manually ping the creative director or set their own reminders. Sagekit handles the entire handoff.
Here are the actions we’ll configure in the “Do this…” section:
- Action 1 Assign Task: Instantly assign the review task to the “Creative Director.”
- Action 2 Set Due Date: Automatically set a due date for that task to 24 hours from the time of upload.
- Action 3 Send Notification: Post a message to the #design-reviews Slack channel, tagging the director and including a direct link to the file.
And just like that, you’ve built a completely hands-off approval process. You can apply this same logic to so many other parts of your business, from onboarding new clients to managing your sales pipeline. For more inspiration, take a look at our guide on building an automated lead generation system.
Running and Scheduling Your New Automations
Building a workflow is a huge win, but the real magic happens when you set it loose. This is where you move from just building the engine to actually driving the car and letting it automate project management for you.
In Sagekit, you have a couple of options for getting your automations running. The first is what we used in our previous example: having them kick off based on a trigger. These are the automations that spring into action in real-time, right after a specific event happens—like a file getting uploaded or a task’s status changing.
The other option is to run them on a schedule. These are your set-it-and-forget-it workhorses. Think of a daily digest that pulls key metrics and posts them to Slack every morning at 9 AM, or a weekly automation that archives completed projects every Friday afternoon. These run on a fixed timetable, which guarantees consistency without you having to lift a finger.
For instance, you could streamline communications by connecting otherwise separate tools; our guide on integrating Google Calendar with Slack shows just how powerful these kinds of connections can be.
Safely Testing Before You Go Live
Before you unleash your new creation on the entire team, you absolutely have to test it in a controlled environment. A botched automation can create way more confusion than it solves. Trust me, you want to do a dress rehearsal.
Here’s a simple pre-flight checklist I always follow:
- Create a Sandbox: Set up a test project or a private channel where you can run the automation without messing up anyone’s real work.
- Run a Manual Test: Trigger the workflow yourself with some sample data. Did it assign the task to the right person? Is the notification text correct?
- Check Every Action: Walk through your automation sequence and verify that each step fires exactly as you planned. If it’s supposed to create a task and send an email, confirm both things actually happened.
This small upfront investment of time will save you from some major headaches down the line.
Key Takeaway: Always test your automations in a safe, isolated environment first. Start small, verify the results, and only then roll it out to your team. This incremental approach builds trust and ensures a smooth adoption.
Monitor and Troubleshoot with Ease
Once your automations are live and running, Sagekit’s activity log becomes your mission control. This log gives you a transparent, real-time feed of every single automation that runs, showing you what kicked it off and what actions it performed.
Keeping an eye on this log is essential for making sure everything is working as it should. It’s interesting—while only about 23% of organizations use project management software, that number jumps to 77% for high-performing projects. The problem is, 54% of organizations still can’t track project KPIs in real-time, which is a critical gap Sagekit’s monitoring features are designed to close. You can discover more insights about these project management statistics to see why this is so important.
If an automation ever fails or does something unexpected, the activity log is the first place you should look. It will pinpoint the exact step where the error happened, making it much quicker and easier to fix. This feedback loop is what allows you to refine your workflows and build a truly resilient, automated system for your team.
Advanced Automation Tips for Power Users
Alright, once you’ve gotten comfortable with the basics, it’s time to really let Sagekit shine. This is where you move beyond just saving a few minutes here and there and start building a smart system that manages project complexity for you. When you automate project management at this level, it’s like having a digital assistant working 24/7.
These next-level strategies are all about making your workflows more responsive and weaving them into the tools your team already uses every day. This is how you turn Sagekit from a helpful app into the core of your operational engine.
Building Smarter Workflows with Conditional Logic
Advanced automation is all about nuance. Let’s be real—not every situation is the same, so your workflows shouldn’t treat them that way. This is where conditional logic, or “if-this-then-that” rules, completely changes the game. It gives your automations the power to make decisions based on specific criteria you set.
Think about an overdue task. A basic automation might just send a generic reminder. But a smarter workflow using conditional logic can do so much more.
For example, you could set up a rule in Sagekit that says:
- IF a task is more than 3 days overdue…
- AND its priority is “High”…
- THEN automatically escalate it by reassigning it to the project lead and dropping a high-priority alert in your team’s Slack channel.
This creates an intelligent safety net. Instead of every late task getting the same nagging notification, the system identifies the ones that pose a real risk to your timeline and takes decisive action. This kind of targeted approach means managers only step in when it’s absolutely necessary, which cuts down on notification noise and keeps projects from derailing.
Integrating Sagekit with Your Team’s Favorite Tools
Your project management tool can’t live on an island. Your team spends its day in other apps—Slack for comms, Outlook for calendars, you name it. The most effective way to automate project management is to bring the information to where your team is already working.
When you connect Sagekit with these platforms, you build a seamless bridge for information to flow, which means less time spent switching between tabs and more time getting work done.
One of the most effective integrations I’ve set up connects project updates directly to a shared Slack channel. When a major milestone gets checked off in Sagekit, it instantly posts a celebratory message to the whole team. It seems small, but it does wonders for morale and keeps everyone in the loop.
Here are a few other powerful integrations to consider:
- Slack/Teams Notifications: Send tailored alerts for new assignments, comments, or deadline reminders straight to specific people or channels.
- Outlook/Google Calendar: Automatically create calendar events for project kick-offs or even block out focus time for a developer when they get assigned a complex task.
- Google Drive/Dropbox: Kick off a workflow in Sagekit the moment a new file lands in a shared folder, like automatically starting a design review process.
These connections make Sagekit the central nervous system for your projects. It pushes and pulls information from your other tools, ensuring everything is up-to-date without anyone having to lift a finger. This is what separates simple task tracking from a truly connected and automated project ecosystem.
Answering Your Top Questions About Automation in Project Management
Jumping into automation with a tool like Sagekit is exciting, but it naturally comes with questions. I’ve seen teams hesitate, and it’s usually over the same few concerns. Let’s clear the air and tackle those common “what ifs” right now.
Where Should I Even Begin? What’s the First Thing to Automate?
This is the big one, and my advice is always the same: start with the boring stuff. Seriously. Look for the tasks that are repetitive, time-consuming, and don’t require a lot of complex thought.
These are the low-hanging fruit and perfect first targets:
- Nagging Reminders: Think about those daily or weekly pings for status updates. Let the machine do the nagging for you.
- Initial Task Assignments: If you use project templates, you can have tasks automatically assigned to the right people the second a new project kicks off.
- Simple Reporting: Automate the generation of a basic weekly progress report that pulls key metrics for stakeholders. It saves a ton of time.
The goal here isn’t to boil the ocean. It’s to get a quick, easy win. Once you master these simple workflows, you’ll build the confidence and momentum to tackle more complex processes.
Will This Make My Team Obsolete? Does Automation Replace People?
Absolutely not. This is probably the most common fear I hear, but it’s based on a misunderstanding of what automation is for. Good automation doesn’t replace human intelligence; it frees it up.
Think of it this way: automation handles the tedious, administrative grind so your team can focus on what they do best—strategy, problem-solving, and creative thinking. It’s about augmenting your team, not replacing them.
A smart strategy is to build in “human-in-the-loop” checkpoints. For example, an automation can flag that a project is at 80% of its budget, but it’s a project manager who decides whether to reallocate funds or alert the client.
This way, you get the speed of a machine with the critical oversight only a person can provide.
What’s the Biggest Mistake People Make When Starting Out?
Hands down, the single biggest pitfall is trying to do too much, too soon. I’ve seen teams try to automate their entire project lifecycle in one go, and it almost always ends in a tangled, confusing mess that nobody wants to use.
The key is to think small. Pick one process. Just one. Automate it, test it, get feedback from your team, and show everyone how much time it saves.
This incremental approach is a game-changer. It lets your team get comfortable with the new way of working and proves the value of automation one step at a time. Each small victory makes the next one that much easier.
Ready to stop chasing down status updates and start building smarter, more efficient workflows? Sagekit gives you the tools to automate your project management tasks in just a few minutes. Start your free trial today and feel the difference.